More homeowners are showing up to our first meeting with a picture they made in ChatGPT or another AI tool. We love it. A rendering tells us more about what you want in ten seconds than a long list of features ever could.
A rendering is also only the start. Here is how we take one from picture to finished project, using a current outdoor living project as the example.
1. Start with the picture
AI images are good at mood: the look of a cedar ceiling, how a fire pit sits in the yard, the feeling of an outdoor room you would actually use. They are not construction plans. An AI tool can't see the slope of your yard, your setbacks, your HOA's rules, where your gutters drain, or how a new roof has to tie into the one you already have.
So bring the image, a sketch or a few photos you've saved. We treat it as the brief, not the blueprint.
2. Walk the property together
Next is a free 30-minute visit at your home. We look at the back of the house, the grade, drainage, where a roof can tie in and how materials and equipment will get to the back yard. We also talk through how you want to use the space and what you want to spend.
Your estimate comes within three business days of that walkthrough.
3. Refine the design
This is where the picture becomes a project. We rework the idea with real materials, real dimensions and real construction details so it fits your house and your lot. Some parts of an AI image carry over closely. Others have to change to be buildable or to fit the budget, and we'll tell you which is which.
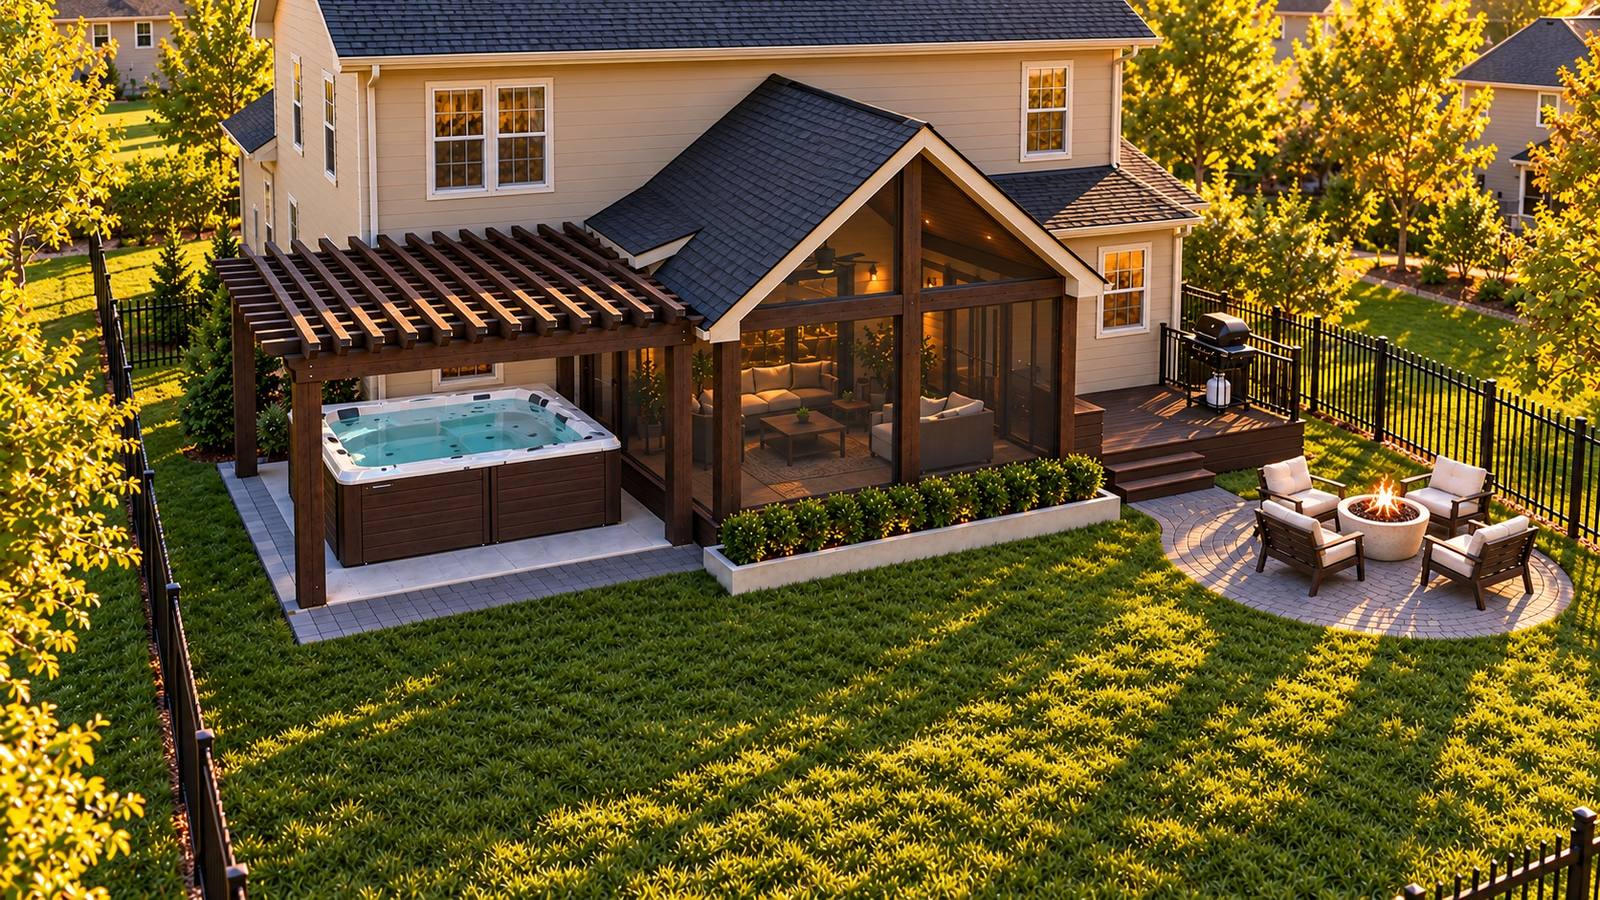
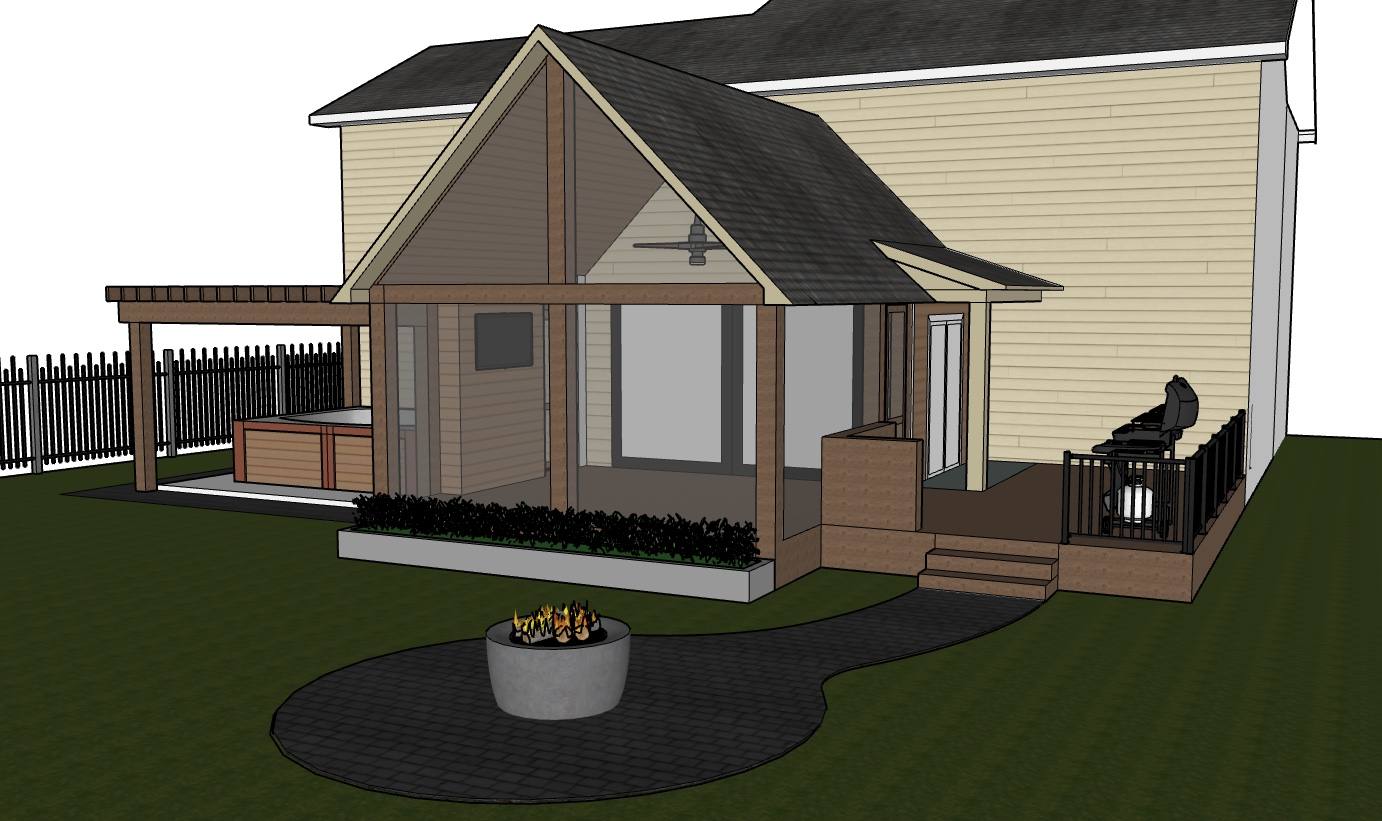
On the project above, the homeowner came to us with an AI-generated picture of the backyard they wanted. We turned it into a revised design for their actual house: a gabled screened porch with a TV wall, a Trex deck with a bar area, an open pergola over the hot tub and a stamped-concrete fire pit area and path. Then we built it out as a 3D model to work through the rooflines and layout before anything gets ordered.
4. Plans, HOA and permits
Once the design is approved, we produce the plans and work through the HOA requirements and permits your project needs. Your deposit is the actual cost of producing those plans and submitting for permits, not a percentage we picked.
Approval timelines are set by your HOA and your city or county, so we give you our best estimate and keep you posted as it moves.
5. Build the approved project
During construction you get an update every day in your client portal, and we answer questions as they come up. If we find something hidden once work starts, like rot behind siding, you get a written change order to approve before we go further. If a mistake is ours, fixing it is our cost, not yours. Our workmanship is warrantied for one year.
Where the example project stands
The homeowner has signed off on the design, and the project is in preconstruction. There are no construction photos yet, so we aren't showing any. Everything above is design work.